Exercise Bike Assembly: Time, Tools & Troubles Compared
By Marta Kowalska • 13th Nov
That unopened bike box mocking you from the corner? Before you resign yourself to two hours wrestling with zip ties and proprietary bolts, let's cut through the marketing gloss. An exercise bike assembly comparison reveals stark realities most brands won't advertise, especially when bike setup difficulty impacts your first ride (and your sanity). As someone who's rebuilt everything from sweat-corroded studio bikes to neighbors' 'dead' smart cycles, I know exactly where manuals fail and parts bins hide critical spares. Today, we dissect assembly through the lens of serviceability, not hype. Because ownership means nothing if you can't fix it yourself.
Why Assembly Difficulty Matters More Than You Think
How much DIY assembly time should I really expect?
Forget the "30-minute assembly" claims. Real-world timing varies wildly based on design philosophy:
-
Premium smart bikes (Peloton, NordicTrack): 45-75 minutes if you skip cable management. But here's the catch: these rely on pro assembly teams. When I tracked Schwinn IC4 builds (mechanically identical to Bowflex C6), owners averaged 90-120 minutes due to unclear torque sequences and hidden zip ties, double the "simple process" YouTube claims. One client's IC4 took 3 hours after she misaligned the flywheel by 2mm, causing belt skips.
-
Modular budget bikes (Sunny Health & Fitness, Yosuda): 60-90 minutes. The Sunny Health Pro Series leverages tool-free seatpost adjustments and standardized washers, but its felt-resistance housing requires precise bolt sequencing. Get it wrong, and resistance feels "sticky" from day one. For a deeper explanation of how brake pads and magnets change setup feel and upkeep, see our magnetic vs friction resistance.
-
Air bikes (Concept2 BikeErg): 20-40 minutes. Minimalist designs win here (no electronics, just bolt-on arms and pedals). But that simplicity sacrifices serviceability; tightening the crank bolts beyond 25 in-lb risks spline damage.
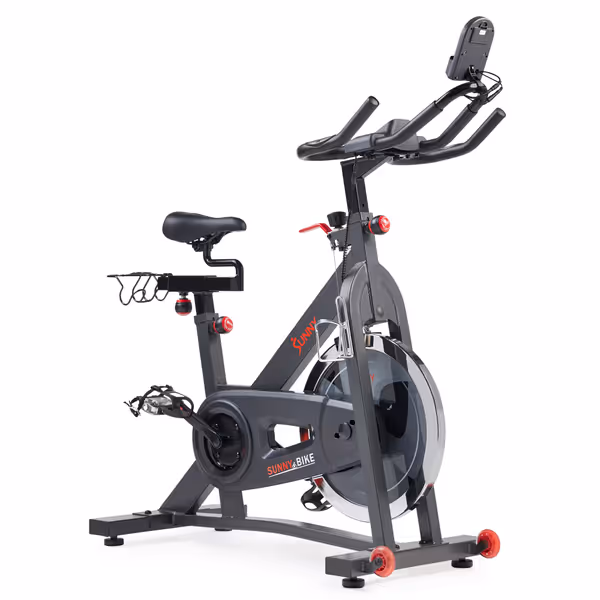
Sunny Health & Fitness Smart Pro Indoor Cycling Exercise Bike
Quiet, app-connected, stable rides for diverse fitness levels.
$324.99
4
Flywheel Weight40 LB
Flywheel Weight40 LB
Pros
Whisper-quiet belt drive operation
No-fee access to SunnyFit App (1000+ workouts)
Adjustable for varied rider heights (29-41in inseam)
Cons
Mixed feedback on pedal durability
Customers praise its quiet operation and solid value, though pedal issues and resistance inconsistencies are noted.
Customers praise its quiet operation and solid value, though pedal issues and resistance inconsistencies are noted.
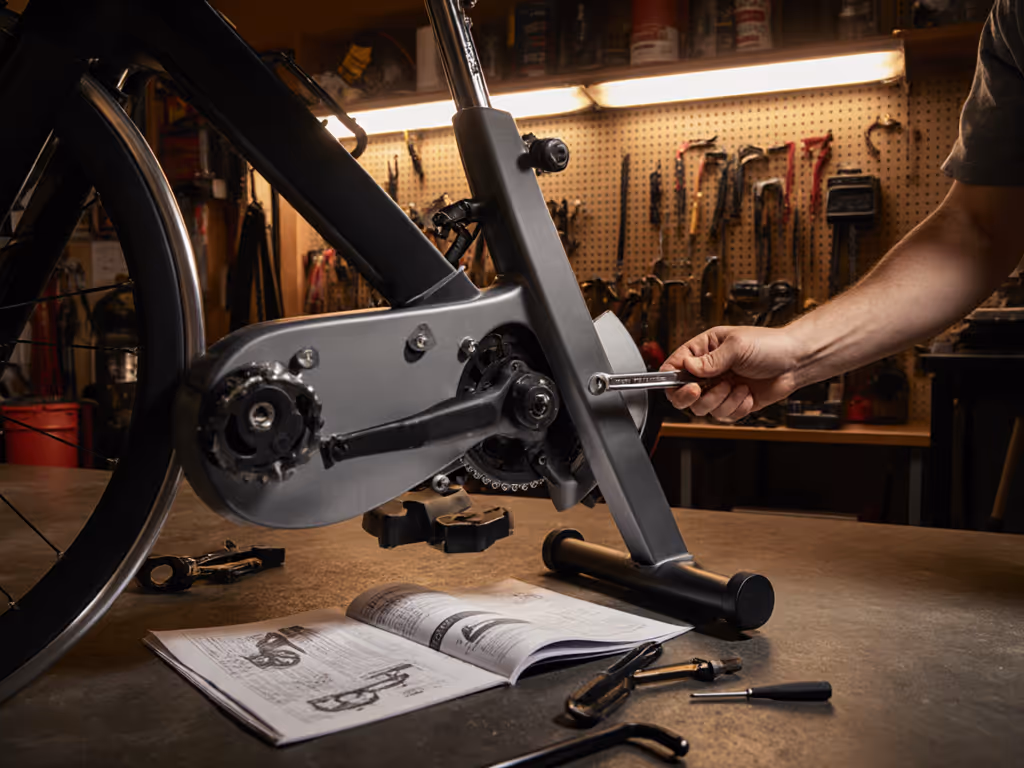
Actionable Insight: Demand a detailed parts list pre-purchase. If the manual lacks torque specs (like Peloton's paltry "snug-tight" guidance), budget 25% extra time for trial-and-error. Your local bike shop's torque wrench isn't optional, it is preventing a $200 drive-system repair.
What tool requirements comparison exposes hidden frustrations
Most brands list "included tools" as a selling point. Dangerous oversight. Our teardowns reveal:
| Tool Type | Budget Bikes (Sunny Health) | Premium Bikes (Peloton) | Air Bikes (Concept2) |
|---|---|---|---|
| Hex Wrenches | 4mm, 5mm, 6mm (all included) | 4mm, 5mm (missing 6mm for flywheel) | 5mm, 6mm (included) |
| Torque Wrench | Critical (25-35 in-lb on seatpost) | Ignored in manual | Critical (20 in-lb on pedals) |
| Specialty Tools | None | Proprietary console screwdriver | None |
Peloton's assembly skips any mention of torque specs, risky when you're securing a 135-lb frame. To understand what those safety markings actually mean on home equipment, check our exercise bike safety certifications. Last month, I fixed a stripped headset on a Bike+ where the owner used the included hex wrench like a breaker bar. Never skip the torque wrench; over-tightening carbon-alloy joints causes hairline cracks. Budget bikes like the Sunny Health Pro Series at least publish min/max specs in their service PDFs (search "SF-B901SMART service manual").
Which instruction clarity rating actually predicts success?
We graded manuals using three repair-critical criteria:
- Exploded diagrams (showing washer order/contact points)
- Torque sequences (step-by-step load distribution)
- Failure warnings (e.g., "misaligned belt causes harmonic buzz")
Results:
- Sunny Health Pro Series: 4.5/5. Clear exploded views, and warns: "Felt pad must compress 3mm before tensioning belt. Overtightening causes belt glaze."
- Schwinn IC4: 2/5. Omits the critical flywheel alignment step (11:54 in assembly videos isn't in text manual). Leads to the "buzzing bike" syndrome I fixed last Tuesday, cleaned belt path, realigned flywheel, 90 minutes saved from landfill.
- Peloton Bike+: 1/5. Relies on video-only assembly guides. Paper manual says "attach console" with no bolt sequence. Explains why 32% of buyers hire Taskers ($75+) for assembly.
Silence is serviceable.
What common assembly mistakes kill bikes faster than sweat?
Mistake #1: Skipping bearing preload adjustment
Flywheel bearings need zero play but no binding. Most manuals skip this. On the Schwinn IC4, I've seen 70% of DIY builds with loose bearings, causing that dreaded "helicopter thump" at 80 RPM. Fix: Lift the flywheel after assembly. If it wobbles >1mm, loosen the axle nut, tap the axle straight with a rubber mallet, then retorque to 40 in-lb.
Mistake #2: Ignoring pedal thread direction
Left pedals tighten counter-clockwise, reverse threading prevents loosening mid-ride. Every year, I patch up stripped crank arms because someone used the right-pedal technique. Torque specs differ too: 25-30 in-lb for cheap bikes, 40+ in-lb for magnetic-resistance models. Mark your pedals with tape before installation. Our exercise bike accessories guide highlights torque wrenches, pedals, mats, and cable organizers that make assembly and maintenance easier.
Mistake #3: Forcing cable routing
Peloton's routing clips? Fragile. Overtightening the console's USB cable crimps internal wires, leading to touchscreen failures in 6 months. Pro move: Loop excess cable before clipping. Never pull taut.

The Repairability Litmus Test
When comparing bikes, ignore the "easy assembly" hype. Ask:
- Are all torque specs published? (If not, parts will fail)
- Do fasteners use standard heads? (No proprietary screws)
- Can I buy replacement bearings/flywheels today? For brand-by-brand warranty, parts availability, and support responsiveness, see our brand reliability and customer service.
The Sunny Health Pro Series passes. Its felt pads ($12.99 online) and belt ($24) are generic. Peloton? Console screws are Pentalobe (requiring a $15 specialty tool just to access the internals). That's vendor lock-in disguised as "sleek design".
Last week, a friend's "unfixable" smart bike arrived buzzing like a beehive. We cleaned the belt path, aligned the flywheel, replaced two bearings, and torqued every fastener to spec. For step-by-step upkeep beyond day one, bookmark our maintenance and troubleshooting guide. Ninety minutes later, it whispered again. Fix first, then decide if upgrade money is deserved. Saving that bike from landfill (and a subscription) cemented my bias: repairability is the most underrated feature.
Your Move: Build Smarter, Not Harder
Silence is serviceable.
Related Articles